For those who don’t know who the Andersons are, they are characters in one of our stories – a vegan family who live in an old bus. Look here
Anyway, I had such fun building a model of their bus last week that I didn’t want to stop there – I had to furnish it! Now, before I show you what I did I want you to bear in mind that I have no previous experience of doing anything like this and I just made it up as I went along. So forgive its many imperfections and picture how much I enjoyed doing it – that’s the main thing 😉

First I re-opened the cardboard model and carefully cut out its windows with a tiny pair of nail scissors

Then I cut out some clear plastic from an old fruit punnet and stuck it on the inside. Now my windows have ‘glass’!
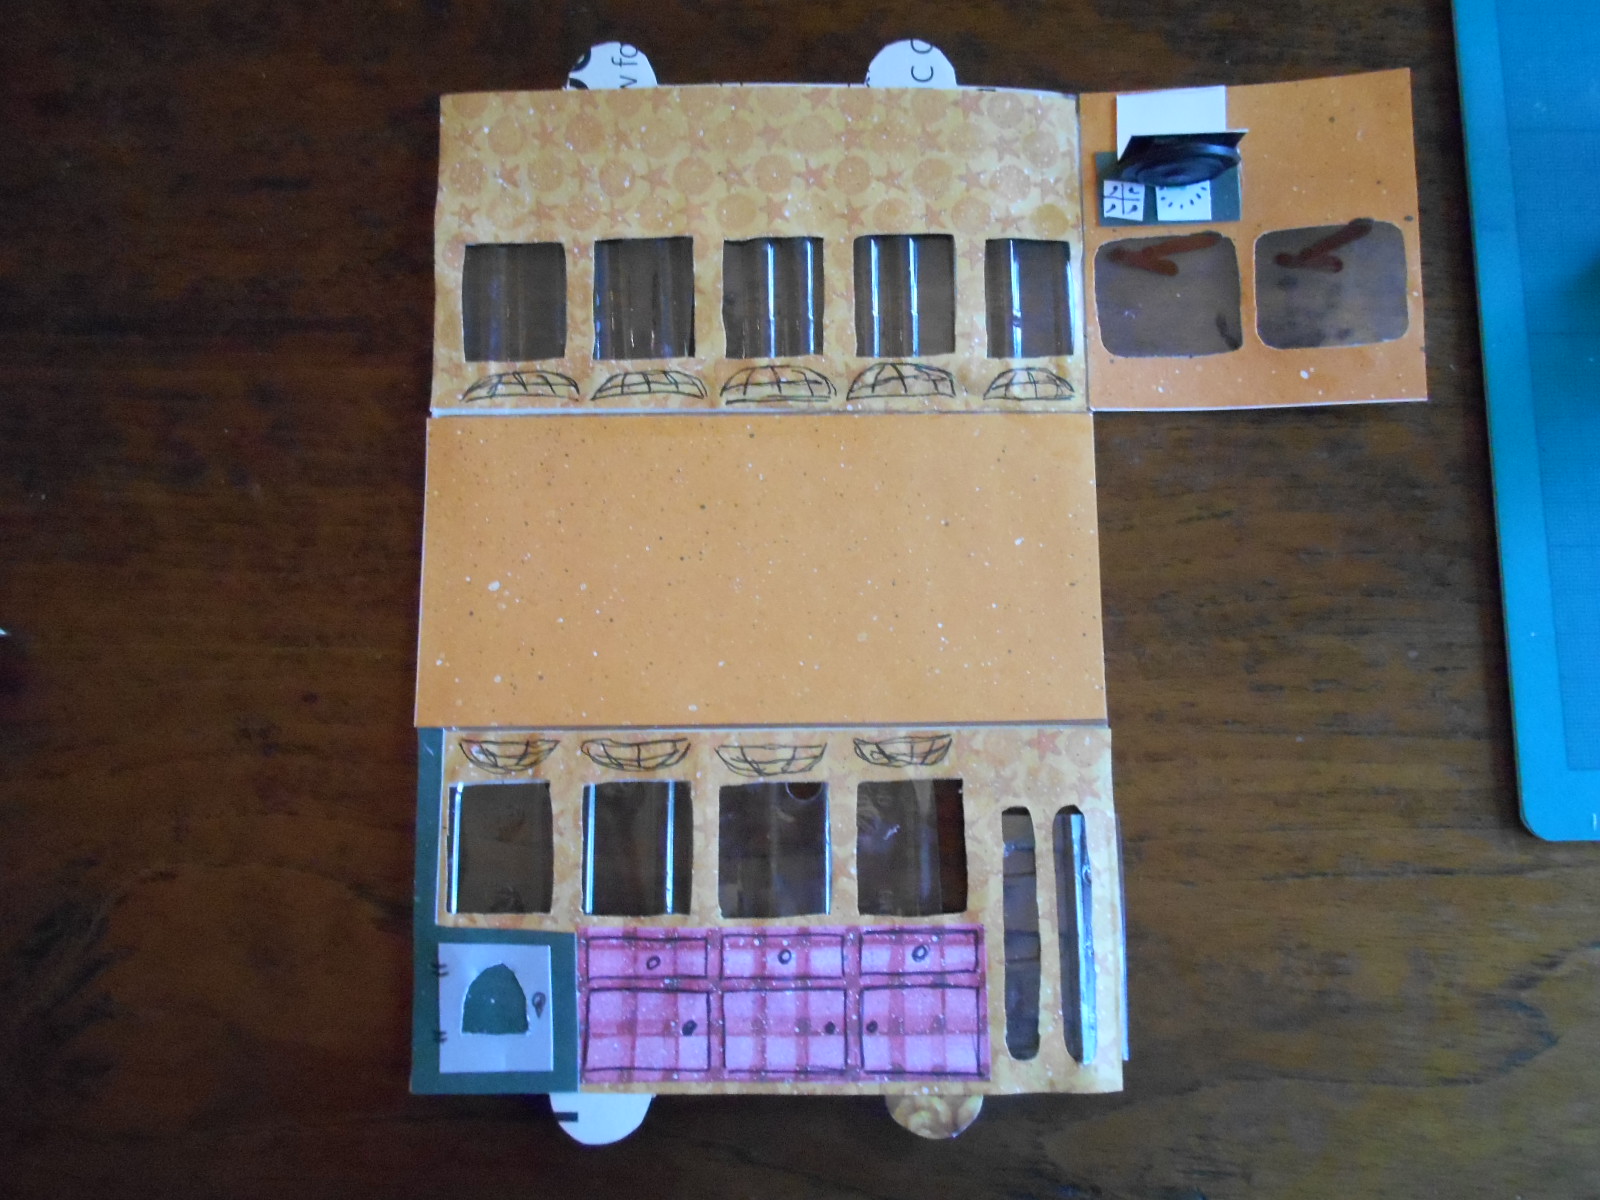
I covered the inside with decorative paper …

… and stuck on some cupboards and a woodburner on one side, and drew some storage racks above the windows.

I found some boxes of matches in the drawer and decided my husband wouldn’t mind if I used the boxes – I left him the bit with the striking strip!

I made one of them into a bookcase and used the other two to raise the bus floor so that it was above the wheels.
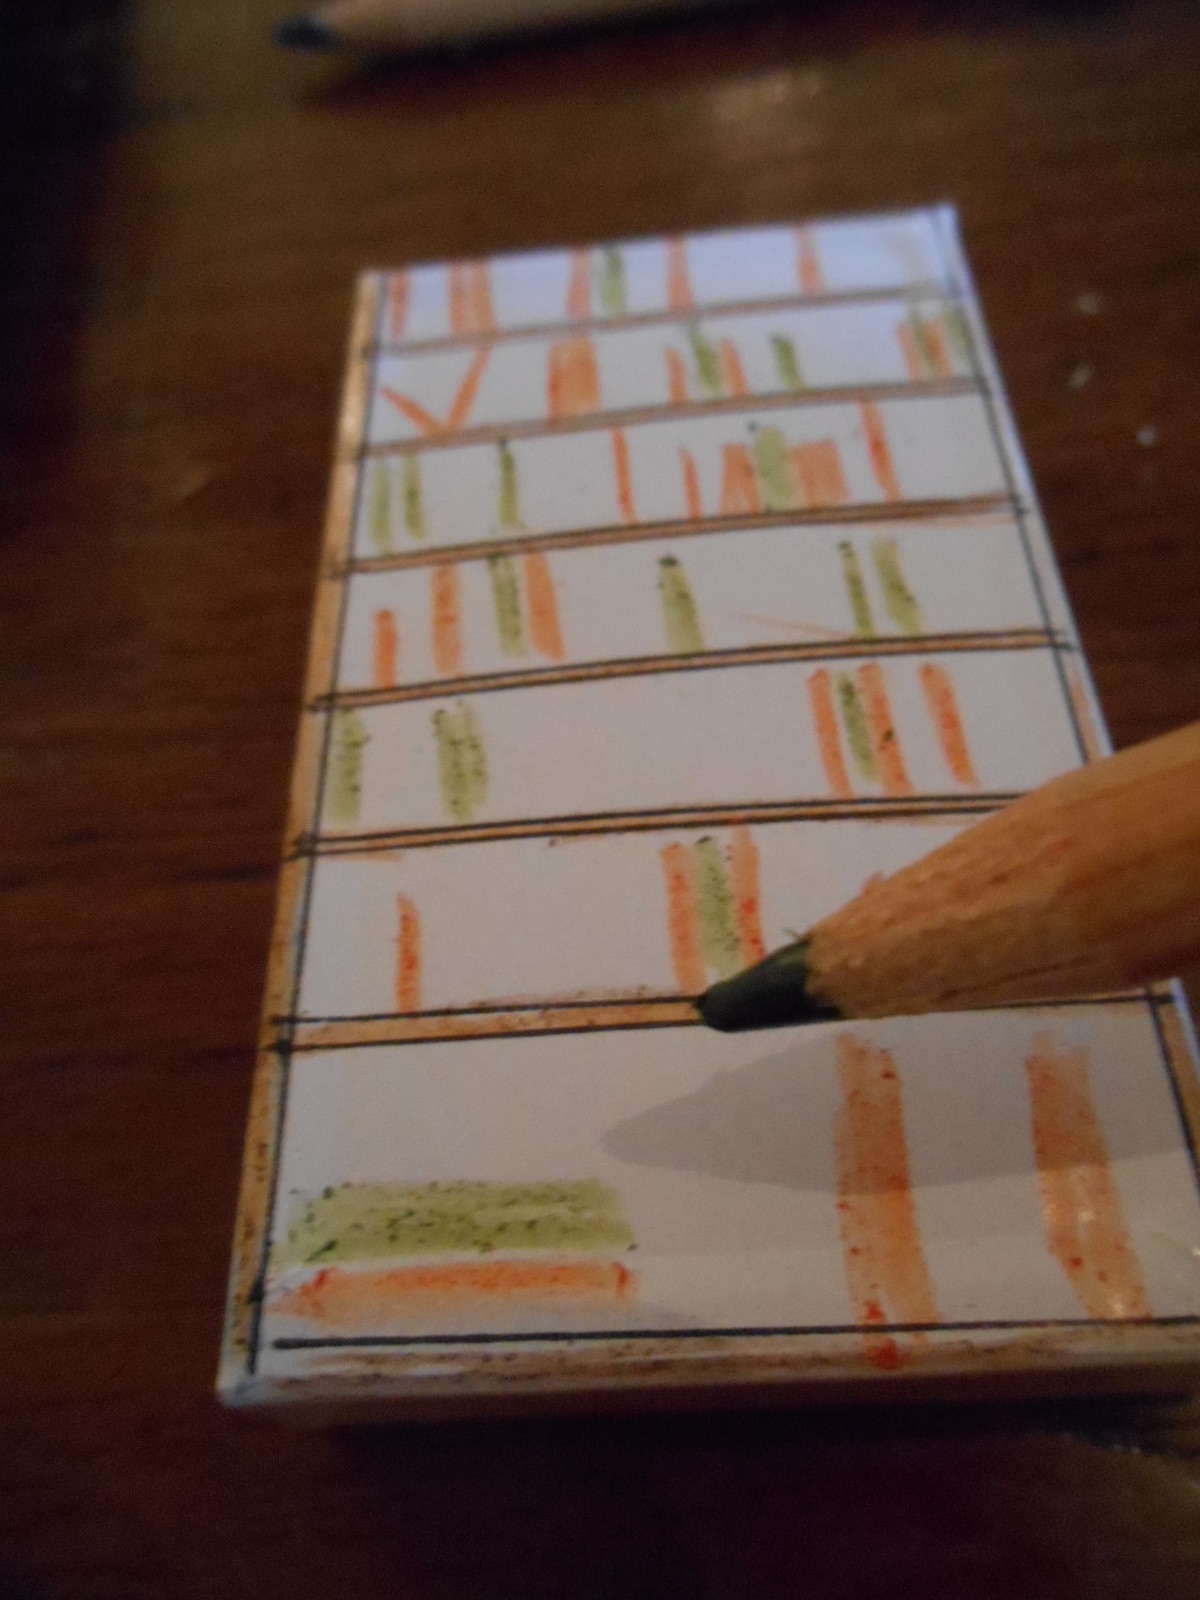
I drew shelves and books on the shelves …
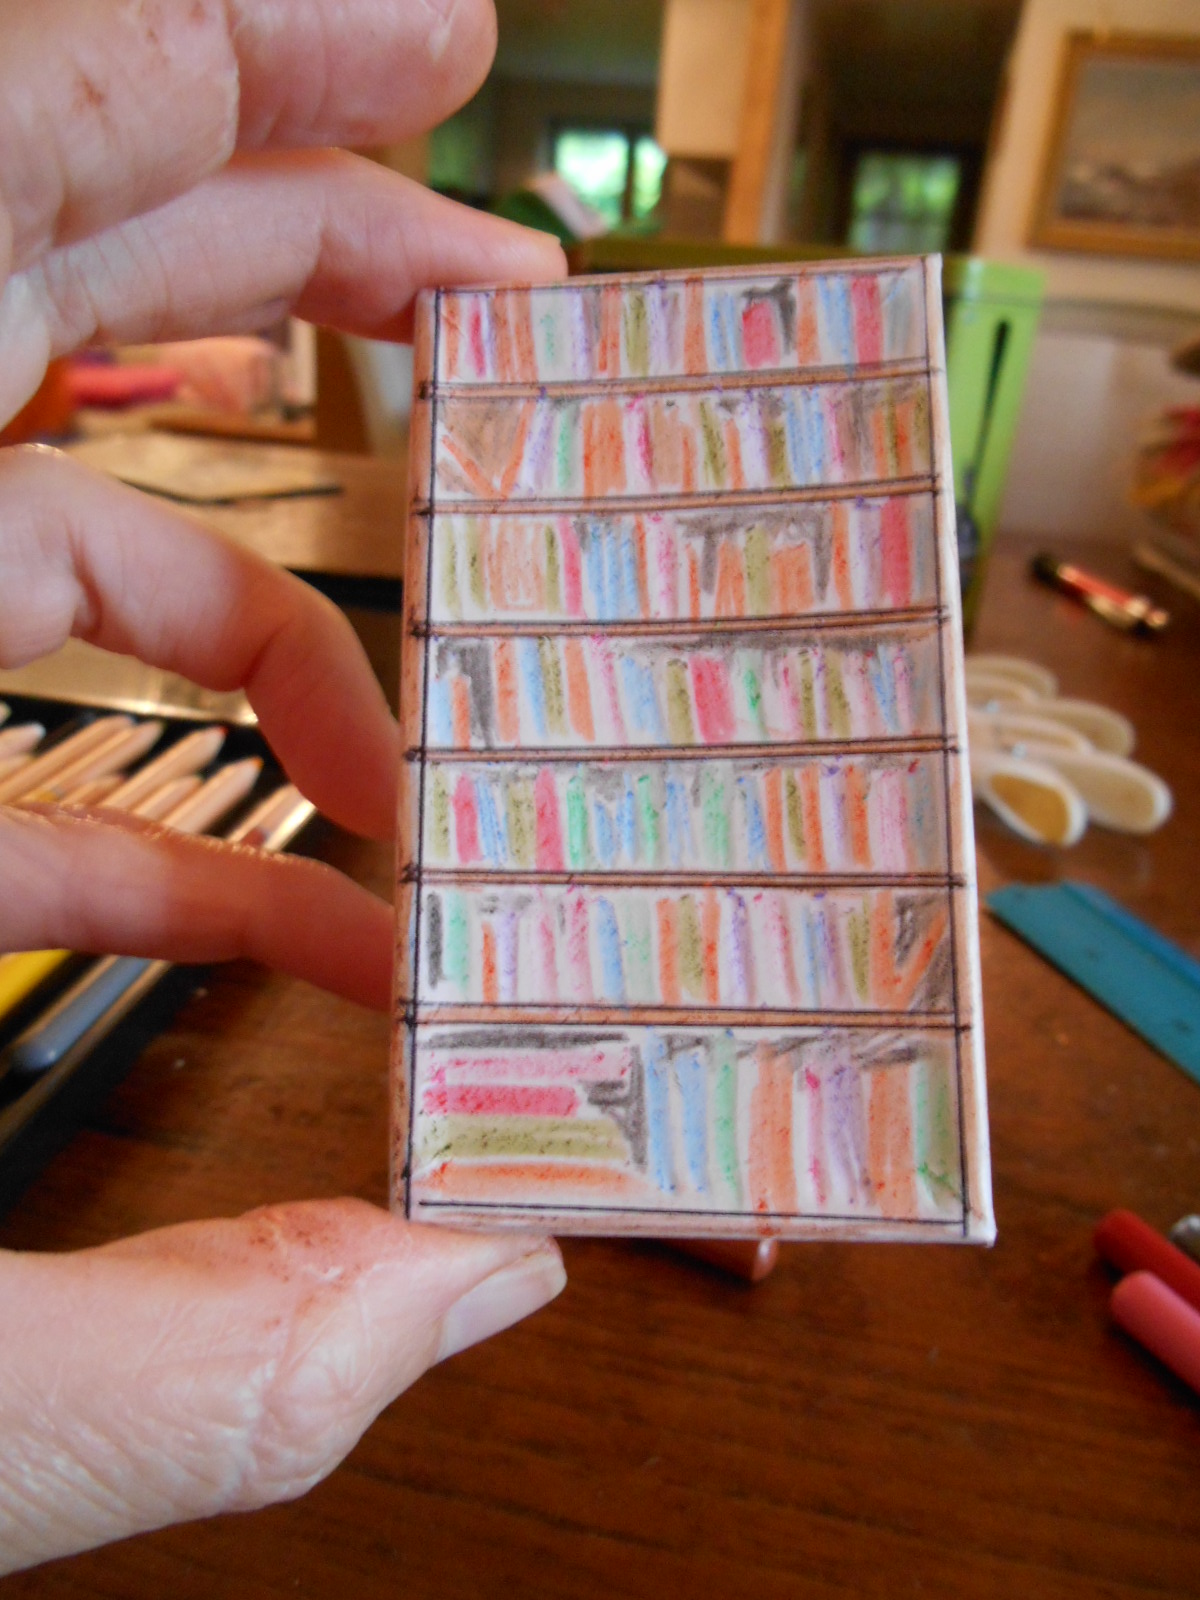
… and coloured them with coloured pencils.
Looking at the pictures I’d drawn of the inside of the bus in episode 1, I wanted to make furniture to match – ish. So I needed a driver’s seat with a partition behind; a table and chairs behind that; and a settee behind that. I made these out of cardboard and stuck them to another piece of cereal box, the same size as the bus roof, covered in decorative paper for the floor. They are very basic, and too wide which is why I only had room to draw the furniture on the other side of the bus, but it doesn’t matter, I can still get a feel of how things are laid out in Old Red.


I see now that the driver’s seat is waaay too big! Oh well.

Then I re-closed the outside of the bus and slotted it over the inside.
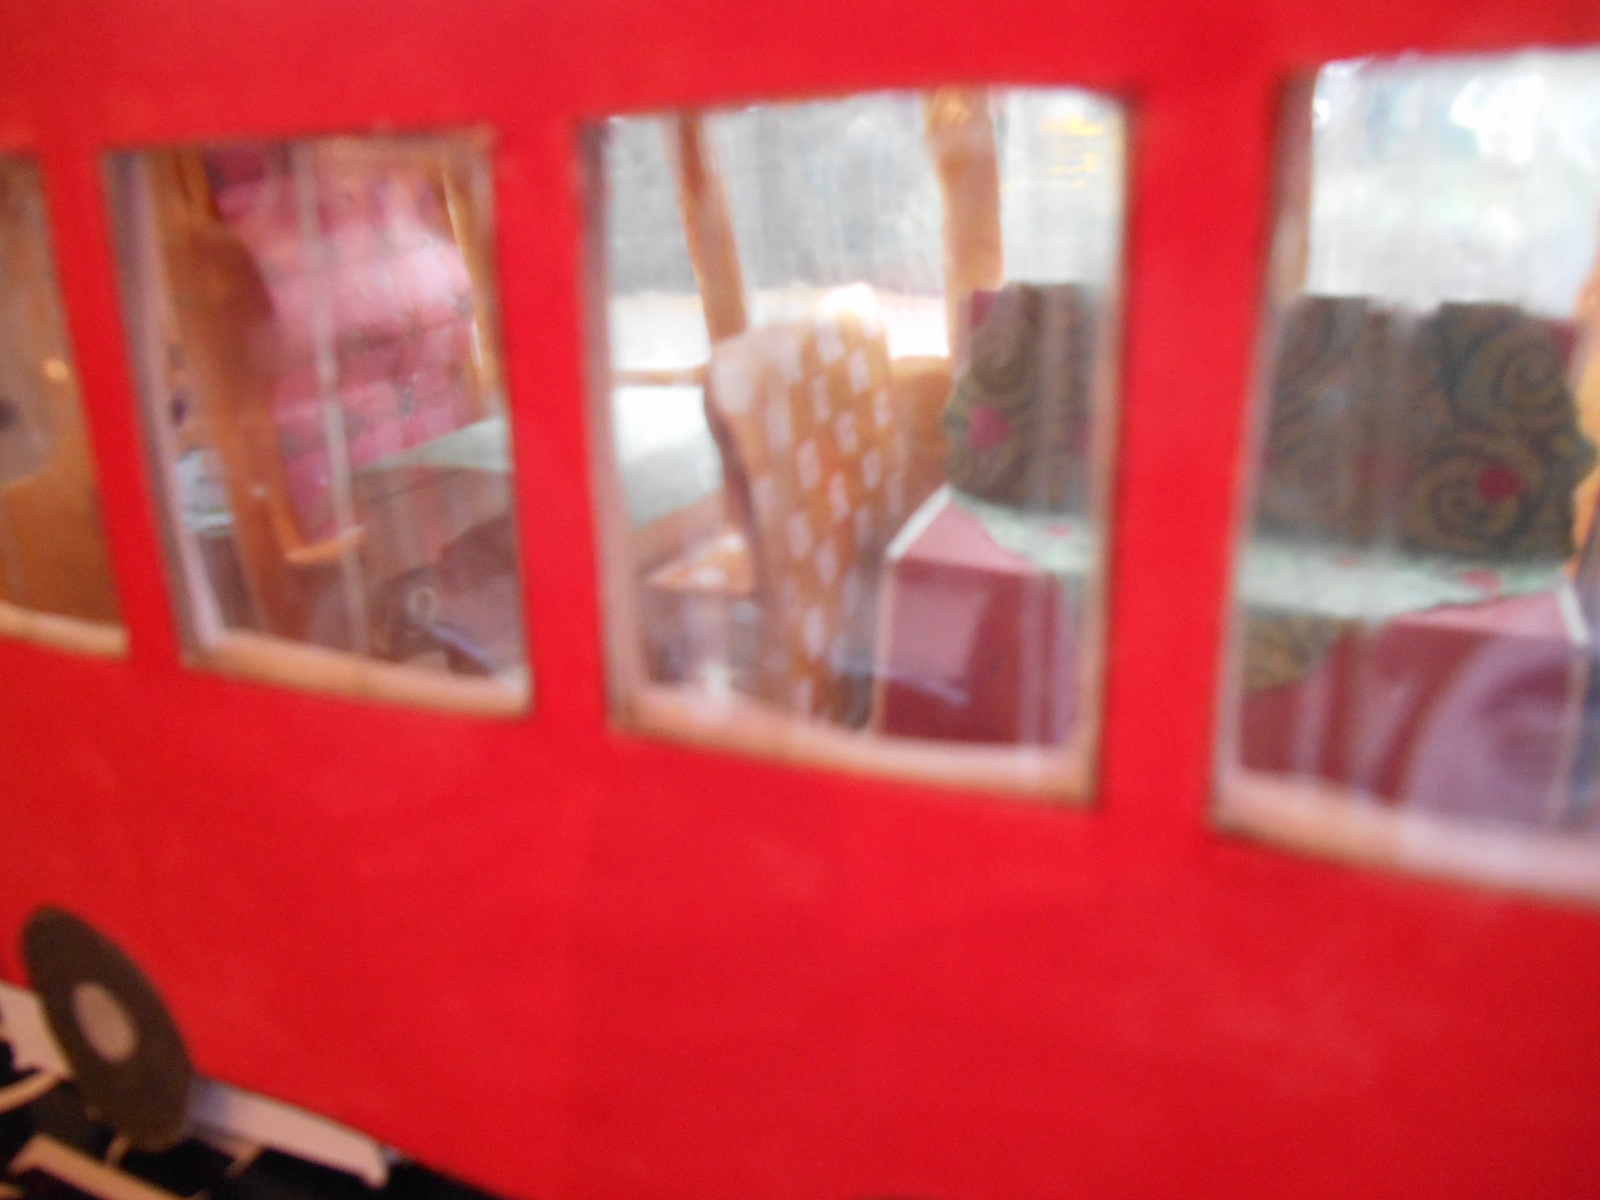
And you can see the furniture through the windows
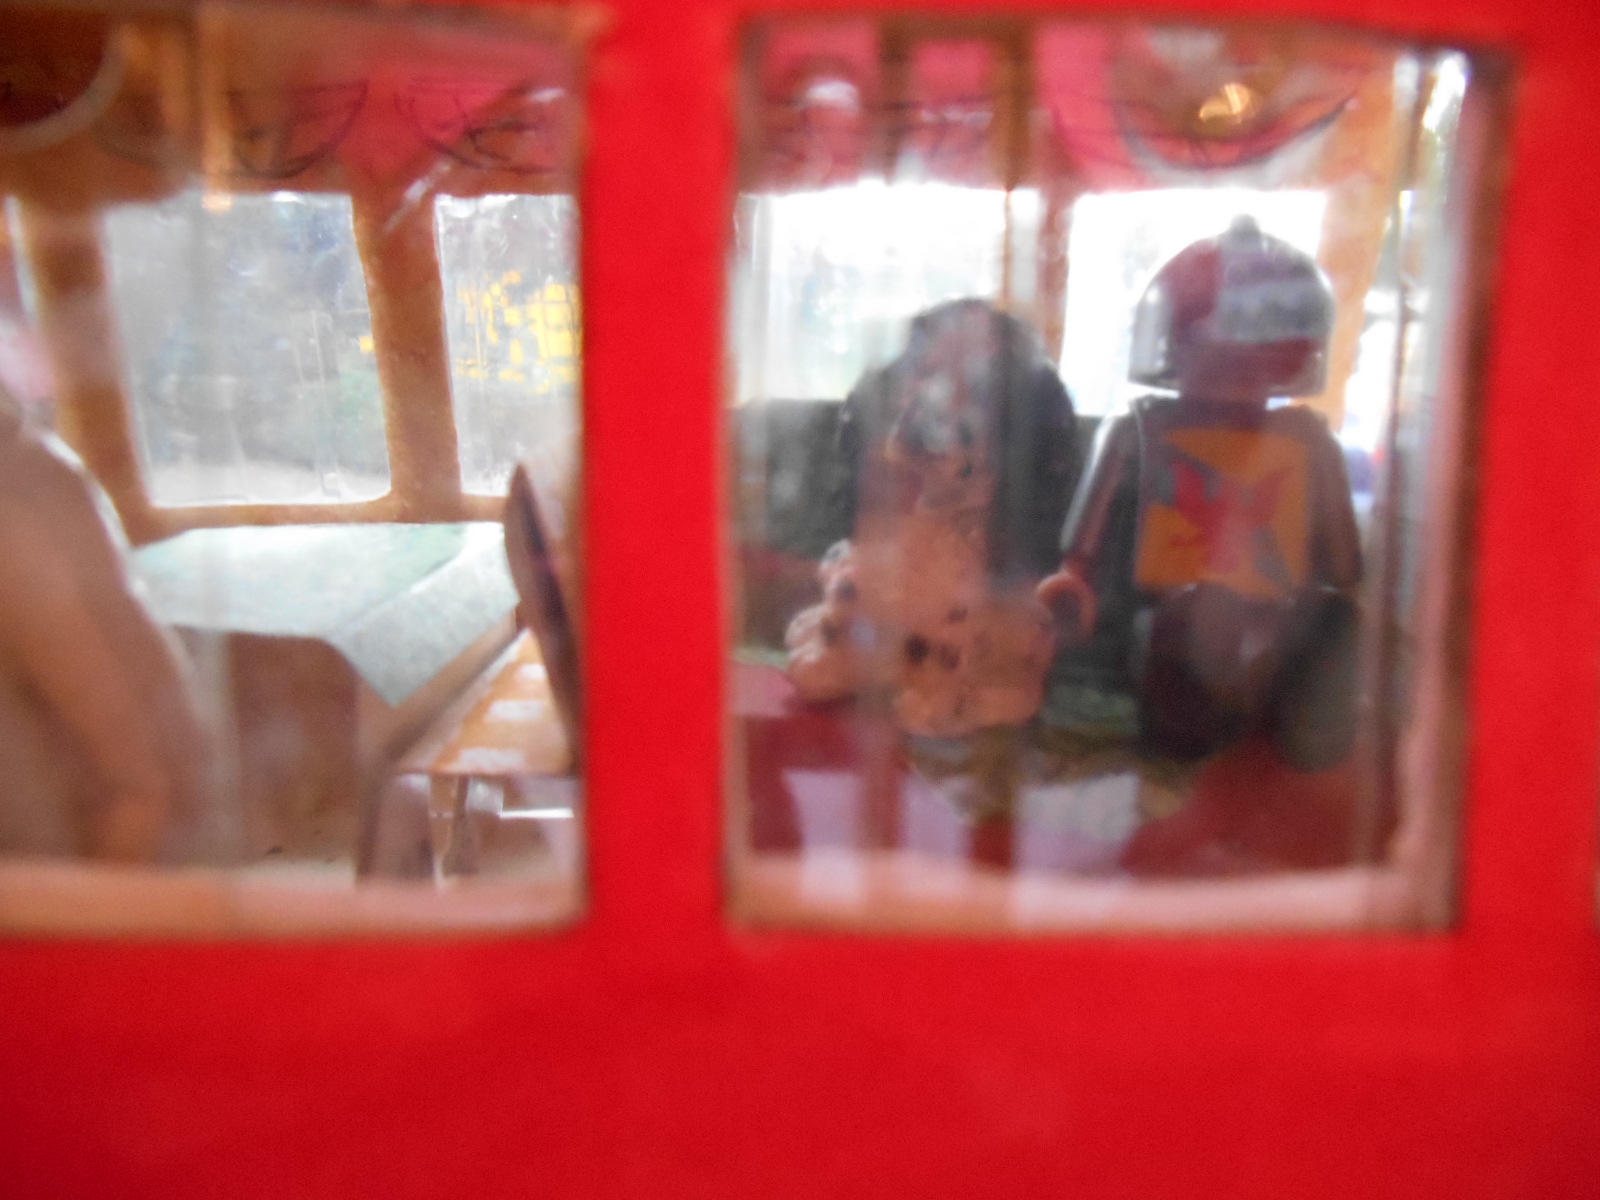
And look – there’s people inside! Denzel is cleverly disguised as a spaniel and Casey is also in fancy dress as a knight – but honestly, it is them!

Old Red. What fun! Why don’t you make one?